Sunday, 19 May 2013
Final Submission
Here is my final submission. It is a compilation of images and a short video at the end which is supposed to have a time-lapse effect. I did this by filming it whilst holding a fan on it. Because it is in miniature it has a different effect than it would in full scale, making the bushes vibrate very quickly giving it a time-lapse illusion. I then removed the background and replaced it with footage of a time-lapse sky/sun-rise.
Backgrounds
Here are some attempts of editing different backgrounds into the image.


In the end my favourite was this one. I edited in a background of 'The Shire'.


Flowers
I decided to add flowers for some extra detail and to break up some of the green. I did this by mixing saw dust into watery paint and then allowing it to dry. I then added small amounts of glue onto certain areas of the bushes and sprinkled on the coloured saw dust, when the glue dried I brushed off the rest of the saw dust and only the glued bits remained.


Painting
Painted the flagging with a dark undercoat to fill in the cracks and then dry brushed on a few lighter coats to get the correct colour and texture. I also added some bits of grass in some of the cracks for realism.


Grass
Here I have added the grass. I am not entirely happy with it but there is still a lot of bushes to add which should make it look better.


Window Leading
The window leading complete using the method I used in my testing stage of thin strips of duct tape onto clear plastic. I am pleased with the outcome although I would have like some of the lines to be a bit straighter but it was very difficult to do.


Flooring
At first I planned on doing wood flooring in the rooms using the same coffee stirrers I used on the walls but this was very time consuming and didn't have the best results. I then tried using different materials and painting them to get different effects. These were my two favourite results. On the right is sandpaper, I tried using different levels of grain and this was the best to give a carpet effect. On the left is a plastic tray that comes with pizzas. I cut it to shape and painted it to give it a patterned carpet look.


Flagging
I have now added the flagging for the upper section of the pavement and covered it in polyfilla ready to be painted.


Front Wall
This is the front wall with the holes cut out and the top layer removed in certain areas to reveal the brick-like texture. Now just to carve in the brick shapes.

The bricks are now carved out and the whole thing is coated in primer ready to be painted.


The bricks are now carved out and the whole thing is coated in primer ready to be painted.

First Room
I added some beams to the wall because it looked a bit empty.

Next, I added a painting of The Shire by Alan Lee and a map of Middle Earth. I also added a mirror and some shelves.


Next, I added a painting of The Shire by Alan Lee and a map of Middle Earth. I also added a mirror and some shelves.

Decoration
Making some of the decorations for the walls inside, such as mirror/picture frames and shelves.


Front Garden
I decided to use the stone wall because after it was covered slightly with the hills it started to look better and much more fitting, also when the greenery is added I think it will look even more believable. This picture shows the wall being added in and further development on the hills. It also shows where I have started to add in the garden flooring.


Inner Walls
Painting and adding the panelling to the interior walls. Ready to be pieced together after some extra decoration. The panelling is done from coffee stirrers because I believe their natural grain translates well in miniature.


Stone Wall
For the stone wall I decided to try using very small stones to replicate the large ones seen in the image. Firstly, I mixed polyfilla with grey paint to get a cement like substance and painted it onto some styrofoam that I had shaped to match the wall. I then pressed each stone into the polyfilla to try and achieve a realistic look. Finally, I went over it all with a dark wash to try and bring out the highlights.
I was not entirely pleased with the overall outcome and I am still undecided whether I will use it in my final piece. I plan to test some different methods first and see which one I am most pleased with.
I was not entirely pleased with the overall outcome and I am still undecided whether I will use it in my final piece. I plan to test some different methods first and see which one I am most pleased with.

Front Door Test
This is a test piece of the front door. The main body of it is made from foam board from which the door and bricks where then cut out. I then used coffee stirrers for the wooden strips on the door and a small button for the door knob. Next, I painted the whole thing to match the colours used in 'Bag End'. Finally, I added some of my home made foliage to the corners to see how good it would look.
Overall, I was quite pleased with the result and believe it could look much more effective with more time and detail put in.

Overall, I was quite pleased with the result and believe it could look much more effective with more time and detail put in.

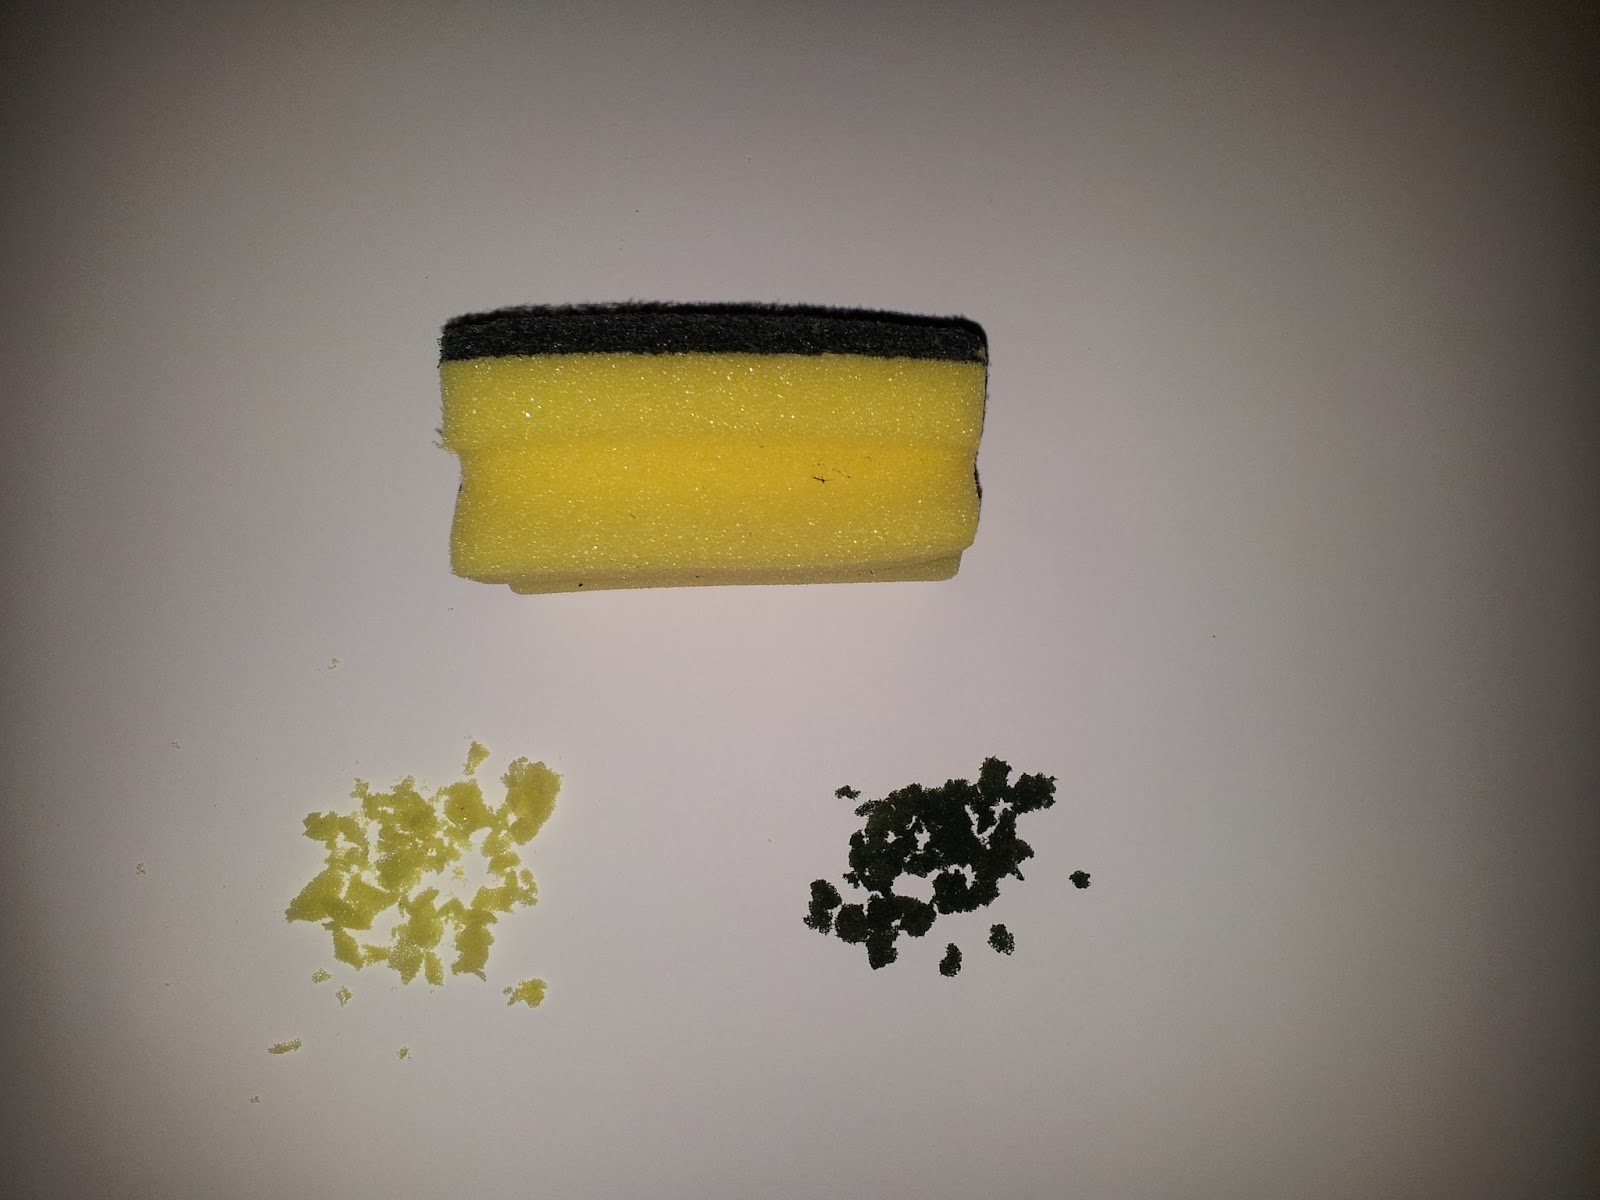
Scenics

After looking at the scenic foliage I decided to attempt to make some myself. To do this I cut up some sponge to as small as I could get it. I then mixed paint to the desired colour and made it very watery. When I was happy with this I mixed the sponge into the paint and allowed it to absorb the colour. I then removed the sponge and allowed it to dry.
I was quite pleased with the outcome and I will continue to make more to mix with the foliage I bought from the model shop.
Friday, 17 May 2013
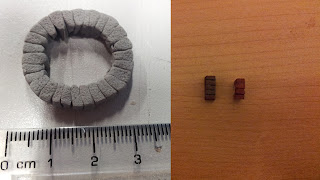
Material Tests
These are some miniature brick tests made with polymer clay, foam board and styrofoam. These bricks were made individually as a test to see if I could keep them to the correct size each time and to test the textures to see how well they would match a real brick.
I found the foam board was the easiest to work with and it had the best brick texture.
This is a test of applying the leading effect to the windows. To do this I cut duct tape into very thin strips and laid it over clear plastic in the desired pattern. I found it worked quite well and with practice could look even better. It may also need a slight dark wash to give it more of an aged effect as it looked very new and clean.

I found the foam board was the easiest to work with and it had the best brick texture.


Orthographics
These are my front and top view orthographics. These we're made to keep me to the correct size/scale throughout the project.


Research
Some initial research containing different views to try and gain a better understanding of the layout.

After my initial research I decided to then take screenshots from 'The Lord Of The Rings' DVD. This was so I could get together as many angles as I could to make the build much easier.


After my initial research I decided to then take screenshots from 'The Lord Of The Rings' DVD. This was so I could get together as many angles as I could to make the build much easier.

Timeplan
For this project I have chosen to make a miniature model of Bag End.
Because of the square ft size constraints this model is going to have to be to a very small scale but I am looking forward to developing my skills is this area because previous miniatures I have made have been to a much larger scale.
Here is my Gantt chart to show how I've planned my time...

Because of the square ft size constraints this model is going to have to be to a very small scale but I am looking forward to developing my skills is this area because previous miniatures I have made have been to a much larger scale.
Here is my Gantt chart to show how I've planned my time...

Week 1 – 2
The first section of my project was assigned to the project plan. This is so I can have a clear understanding of what I need to achieve for my end goals and know how I am going to perform each task.
Alongside this I would be researching into designs for ‘Bag End’ and looking at images from the set. I would also get my own screen shots from ‘The Lord Of The Rings’ films, trailers for ‘The Hobbit’ and backstage footage so I can view the scene from every angle possible and get a clearer vision of how it is built.
Week 2 – 5
The second section I assigned to material testing. During this time I would be researching various methods I could use for building each section. I would then be testing my favourite methods to see which worked best for my specific model, these techniques would then be used later in the final building stage.
Week 5 – 11
This section was assigned to the building process. Throughout this time I would be taking the techniques I already know and the newly learnt techniques to construct my final product to the plans created in the project planning stage. This will also include most of the painting and finishing of the final product.
On top of this I will also still be researching into new techniques in case there are any useful ones that I originally missed. I will also still be researching and referring back to the designs and images of the set to make sure it keeps me on track.
Week 11 – 15 (including holidays)
This final section I have assigned to the finishing of the project. This time is set aside for adding any finishing touches to the model. This time also includes the photographing of the final piece and the final editing in Photoshop.
Alongside this I will again be researching. This time it will be for techniques on how to photograph a miniature and photoshopping methods that me be useful.
Subscribe to:
Posts (Atom)